

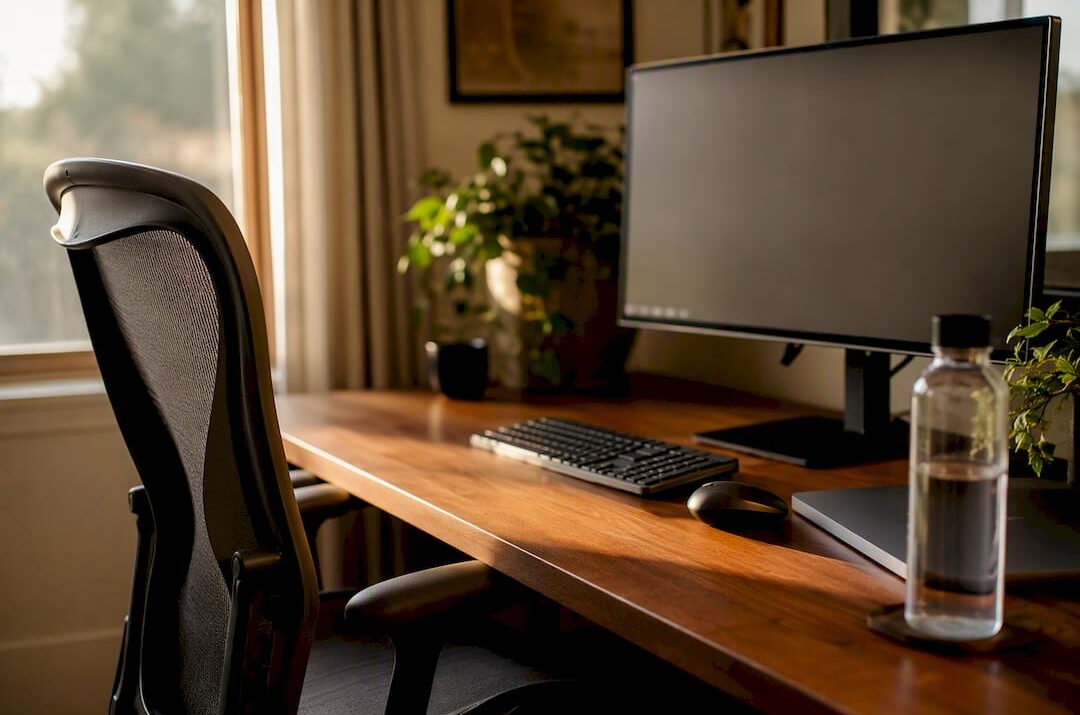

Four changes fix most of the discomfort office and remote workers deal with: a chair set for neutral spine support, a monitor at eye level, a keyboard and mouse close enough to keep elbows at your sides, and regular movement instead of one static “perfect” pose. That combination reflects guidance from Mayo Clinic and university ergonomics programs, plus the 20-20-20 rule for eye strain. Start here:
- Set seat height so feet sit flat and knees are roughly level with hip height
- Raise the monitor so the top of the screen hits eye level
- Pull the keyboard and mouse close, elbows near 90 degrees
- Stand or stretch every 20 to 30 minutes
- Follow 20-20-20: every 20 minutes, look 20 feet away for 20 seconds
Key Takeaways
Neutral posture, an eye-level monitor, elbow-height keyboard placement, and scheduled movement together do more for comfort than any single piece of equipment.
| Point | Details |
|---|---|
| Fix chair height first | Feet flat, knees near hip height, one-inch gap behind the knees for circulation. |
| Raise the monitor | Top of screen at or slightly below eye level, arm’s length away, 20 to 40 inches. |
| Keep elbows close | Keyboard and mouse near elbow height, wrists flat, not extended. |
| Move every 20 to 30 minutes | Alternate sitting and standing rather than holding one posture all day. |
| Protect your eyes | Use the 20-20-20 rule alongside short physical breaks each hour. |
Table of Contents
- Office Ergonomics Tips for Chair Height and Neutral Posture
- How Should You Position Your Monitor for Better Posture?
- Where Should Your Keyboard and Mouse Sit?
- Setting Up Your Desk Layout the Right Way
- Why Movement Beats a Single Perfect Sitting Position
- What Break Schedule Actually Reduces Eye Strain and Fatigue?
- Fixing Ergonomics on a Laptop or in a Tiny Workspace
- The Ergonomics Myths That Waste Your Money
- A One-Minute Ergonomics Check You Can Do Right Now
- Organizing Your Digital Workspace to Cut Mental Clutter
- Why Behavior Design Matters More Than Gear
- Frequently Asked Questions About Office Ergonomics
- Sources
Office Ergonomics Tips for Chair Height and Neutral Posture
Your chair does more work than any other piece of office equipment, and most people set it wrong on the first try. Start with seat height: feet flat on the floor or a footrest, thighs roughly parallel to the ground, and about a one-inch gap behind your knees so the seat edge doesn’t cut off circulation, per the Arthritis Foundation’s chair-fit guidance.
From there, work through these adjustments in order:
- Lumbar support: position it to fill your lower back’s natural curve, then scoot back until your spine actually touches the backrest
- Recline: a slight backward tilt, around 100 to 110 degrees, often reduces spinal load compared to sitting bolt upright
- Armrests: set height so shoulders relax and elbows form roughly a 90 to 110 degree angle; drop them out of the way entirely if they block you from getting close to your desk
- Seat pan depth: adjust or tilt if your chair allows it, keeping pressure off the back of your knees
Pro Tip: After 15 to 30 minutes at your desk, do a quick self-check: shoulders down, low back touching the chair, feet grounded. If you catch yourself perched on the edge of the seat, that’s your cue the lumbar support needs to come forward.
How Should You Position Your Monitor for Better Posture?
Distance first: keep your screen about an arm’s length away, somewhere between 20 and 40 inches, according to UCLA Ergonomics. Height matters just as much. The top of the screen should sit at or slightly below eye level, with the center of the display roughly 15 degrees below your straight line of sight, a placement Mayo Clinic also recommends to keep the neck straight.
- Bifocal or progressive lens wearers: lower the monitor an additional 1 to 2 inches so you’re not tilting your head back to read through the bottom lens
- Dual monitors: keep your primary screen centered in front of you and angle the second one inward, so you’re rotating your eyes rather than twisting your whole neck
- Glare: position screens perpendicular to windows, not facing or backing them, and use blinds or task lighting to cut reflection
Pro Tip: Read a paragraph out loud after adjusting your monitor. If your neck feels strained or you’re leaning forward to see it, the screen is too far, too low, or angled wrong.
Where Should Your Keyboard and Mouse Sit?
Keep both at or slightly below elbow height, and close enough that your elbows stay near your torso instead of reaching forward. Reaching creep, the slow drift of your keyboard away from you over a workday, is one of the most common causes of shoulder tightness by 3 p.m.
- Keep wrists flat and straight, not bent up or down; use ergonomic adjustments to help if your desk sits too high
- Laptop users should add an external keyboard and mouse rather than typing on the built-in setup for hours at a stretch
- Use light pointer sensitivity so you’re not gripping the mouse harder than needed
- If wrist pain persists, a vertical mouse changes the angle of your forearm and often relieves pressure
- Reset your keyboard and mouse position after every call or roughly every 30 minutes
Setting Up Your Desk Layout the Right Way
Think in reach zones. Your primary zone, phone, notepad, water bottle, coffee, should sit within arm’s reach without leaning. Everything else goes further out.
- Place a document holder next to your monitor, not flat on the desk, so you’re not dropping your chin repeatedly to check paperwork
- Clear storage bins or boxes from under your desk so your legs and feet have room to move
- Use a footrest if your feet don’t reach the floor once your chair is at the correct height
- Route cables along the desk edge or through a tray to stop them from tangling with your feet or your chair’s wheels
- Monitor arms free up desk space and let you fine-tune height without stacking books indefinitely; anti-fatigue mats help if you stand for stretches. Wrist rests should support your palms during pauses, not while you’re actively typing
Why Movement Beats a Single Perfect Sitting Position
Muscles and joints are built to move, not hold one shape for eight hours, so alternating postures throughout the day matters more than nailing one static setup. That’s the logic behind sit-stand desks, but the way most people use them undercuts the benefit.
- Change position every 20 to 30 minutes rather than sitting or standing for hours straight
- Program two desk presets, sitting and standing, so switching takes one button press instead of a manual adjustment you’ll skip
- Standing desks raised too high force your shoulders up and strain your neck and traps; match desk height to a relaxed 90 to 110 degree elbow angle, not to how tall you feel standing
- If standing fatigues your legs, add an anti-fatigue mat and keep standing intervals shorter at first
- Stand or pace during phone calls, and use a calendar nudge to prompt a position change between meetings
What Break Schedule Actually Reduces Eye Strain and Fatigue?
The 20-20-20 rule is the single most repeatable habit in this entire list: every 20 minutes, look at something 20 feet away for 20 seconds. Pair it with movement breaks, not just eye rests.
- Take a 1 to 2 minute stretch or walk every 20 to 30 minutes
- Take a longer 5 to 10 minute break, or switch tasks entirely, once an hour
- Neck: gentle side-to-side tilts, holding each for a few seconds
- Shoulders: roll them backward slowly, five to ten reps
- Hands: extend fingers wide, then make a loose fist, repeat ten times
- Lower back: stand and arch gently backward for a few seconds
The Ohio State University Wexner Medical Center ties both the eye rule and the break frequency together as a single routine rather than two separate habits, which is worth noting since most people treat eye strain and physical fatigue as unrelated problems.
Set a recurring timer, block 10 minutes on your calendar as “unavailable,” or use a phone alarm labeled clearly enough that you won’t dismiss it out of habit.

Fixing Ergonomics on a Laptop or in a Tiny Workspace
A laptop screen forces a trade-off: either your neck bends down to see it, or your wrists bend up to reach a keyboard set at eye level. You can’t fix both without separating the two.
- Add a laptop riser or connect an external monitor so the screen reaches eye level, then pair it with an external keyboard and mouse
- In cramped spaces, keep inputs close to your body and use a compact document holder instead of spreading papers across limited desk space
- No footrest? A stack of books works. No lumbar support? A rolled towel behind your lower back gets close
- Fix neck and wrist position first; everything else is secondary to those two
The Ergonomics Myths That Waste Your Money
There’s no such thing as a permanent perfect setup, and chasing one is where most people waste both money and effort.
The best “fit” changes with the task. Typing, reading, and writing each call for slightly different micro-adjustments. Test a new setting for 15 to 30 minutes before deciding whether it works, rather than overhauling your entire desk at once.
Expensive gear doesn’t fix bad habits. A $600 chair with lumbar support nobody uses correctly does less than a $150 chair adjusted properly and checked weekly. OSHA’s computer workstation guidance makes this explicit: there’s no single correct posture for everyone, which is why the agency provides checklists instead of one fixed standard.
- Standing desks set too high are the most common practitioner-observed mistake, raising shoulders and straining the neck instead of relieving it
- Neutral posture, not a rigid “sit up straight” pose, is the actual goal: neck, shoulders, wrists, and spine uncontorted, not stiff
A One-Minute Ergonomics Check You Can Do Right Now
Run through this before you read another paragraph:
- Adjust chair height so feet sit flat
- Tilt or raise the monitor so the top edge hits eye level
- Slide the keyboard and mouse closer, elbows near your sides
- Set a 20-minute timer for your next eye break
Then ask yourself: are your feet grounded, knees level with hips, shoulders relaxed, wrists flat, and neck facing forward without tilting? If any answer is no, a pillow behind your lower back, a stack of books under a laptop, or a small stool under your feet solves most of it in under two minutes.
Organizing Your Digital Workspace to Cut Mental Clutter
Physical ergonomics gets most of the attention, but a cluttered desktop and forty open browser tabs create their own kind of fatigue, the mental kind that makes a well-adjusted chair feel pointless by 2 p.m.
Close tabs and applications you’re not actively using. Every open window is a small, constant decision your brain has to keep re-evaluating, and that background noise adds up over a workday. Group related tasks into separate desktop spaces or virtual desktops if your operating system supports it, one for deep work, one for communication, one for admin tasks, so you’re not toggling between contexts every few minutes.
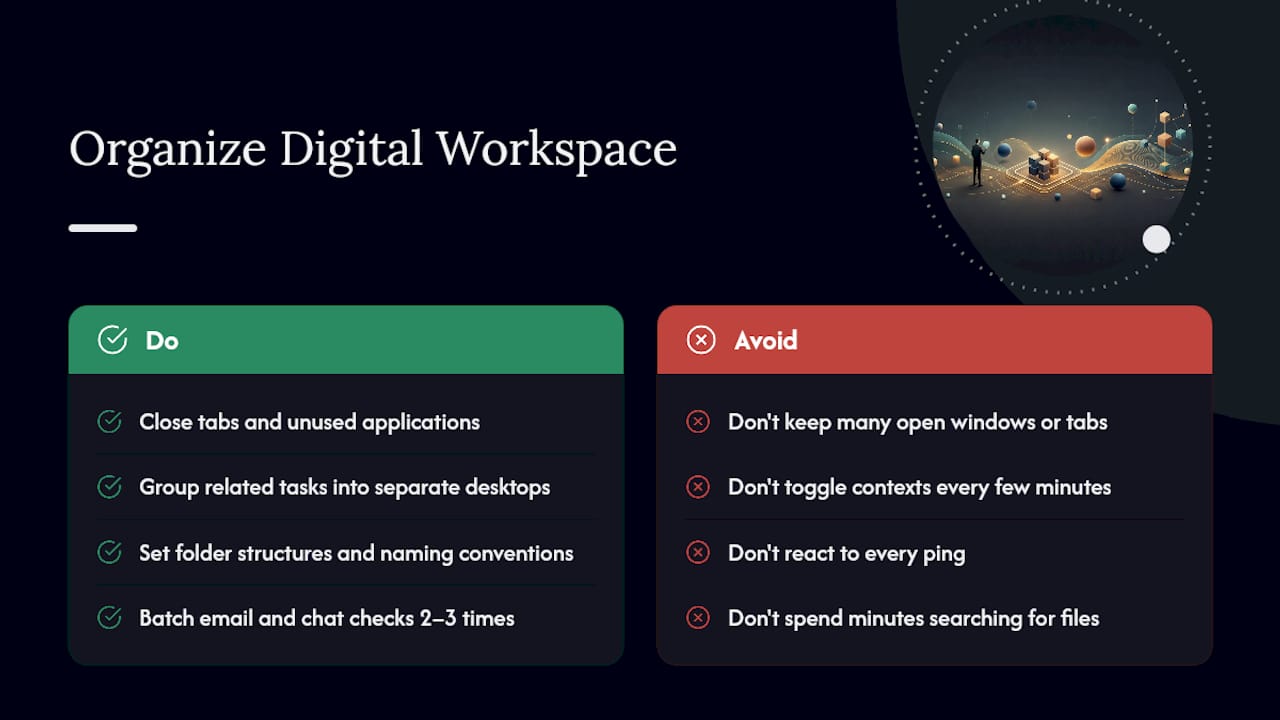
Set up folder structures and naming conventions once, then stick to them. Searching for a misplaced file for five minutes doesn’t just cost five minutes. It costs the mental thread you were following before you went looking for it. The same logic applies to notification settings: batch email and chat checks into two or three windows a day instead of reacting to every ping, which protects both your focus and your posture, since notification-chasing is often what triggers the forward lean and raised shoulders ergonomics advice is trying to prevent in the first place.
If you’re managing a demanding schedule alongside a heavy workload, pairing a clean digital setup with better time management habits tends to compound the benefit rather than just adding to it.
Why Behavior Design Matters More Than Gear
The gap between people who fix their posture and people who buy expensive chairs and stay uncomfortable usually comes down to one thing: whether they actually use the adjustments they have. Most ergonomic equipment is only as good as the habit built around it. A great chair with the lumbar support ignored does almost nothing.
The more useful mindset is treating your setup as something you tweak every week or two, not something you buy once and forget. Test a change for a few days, notice what still bothers you, adjust again.
Frequently Asked Questions About Office Ergonomics
What is the single most impactful office ergonomics tip?
Fixing monitor height tends to deliver the fastest relief, since a screen positioned too low is the most common cause of neck strain among desk workers.
How often should I take breaks for good office posture?
Aim for a 1 to 2 minute stretch every 20 to 30 minutes and a longer 5 to 10 minute break every hour, alongside the 20-20-20 rule for eye strain.
What’s the best standing desk height?
Set the desk so your elbows form a 90 to 110 degree angle while typing, not based on how tall you feel standing. Too high raises your shoulders and strains your neck.
Do I need an expensive ergonomic chair?
Not necessarily. A moderately priced chair adjusted correctly and used with proper lumbar support often outperforms an expensive chair set up poorly.
How do I improve ergonomics on a laptop?
Add an external keyboard, mouse, and a riser or monitor so the screen reaches eye level. This separates screen height from keyboard height, which a laptop alone can’t do.
This article is general information, not a substitute for advice from a qualified doctor. Consult a qualified healthcare professional about your own circumstances before acting on anything here.
Sources
- Office ergonomics | UCLA Ergonomics
- Relieve computer eye strain | The Ohio State University Wexner Medical Center
- Office ergonomics: Your how-to guide – Mayo Clinic
- eTools : Computer Workstations | Occupational Safety and Health Administration
- Office ergonomics for arthritis | Arthritis Foundation
If your employer offers a formal ergonomic evaluation, request one. For related reading on building sustainable work routines, see Finblog’s guide to managing financial stress.